The captivating dance of fire, with its vibrant hues and dynamic forms, has mesmerized humanity for millennia. From ancient cave paintings to modern digital art, artists have sought to capture its elusive beauty. This article delves into the art of flame drawing, exploring techniques, tools, and the artistic principles that bring this elemental force to life on paper or screen. Whether you're a seasoned artist or just beginning your creative journey, understanding the nuances of depicting fire can add a powerful dimension to your artwork.
Drawing, at its core, is the act of making marks on a substrate by moving something across it. When it comes to something as fluid and ephemeral as a flame, this act transforms into a captivating challenge, inviting artists to blend observation with imagination. This guide aims to provide a comprehensive resource for anyone eager to master the art of drawing flames, offering insights into both foundational principles and advanced techniques. We welcome discussion, technique sharing, gear recommendations, and all kinds of artwork related to this fiery subject.
Table of Contents
- Understanding the Fundamentals of Flame Drawing
- Essential Tools and Materials for Drawing Fire
- The Anatomy of a Flame: Breaking Down Its Structure
- Step-by-Step Guide to Basic Flame Drawing
- Advanced Techniques for Realistic Flame Drawing
- Drawing Different Types of Flames
- Inspiration and Application of Flame Drawing in Art
- Overcoming Challenges and Continuous Improvement in Flame Art
- Conclusion: Igniting Your Artistic Journey
Understanding the Fundamentals of Flame Drawing
Before diving into the intricate details of flame drawing, it's crucial to grasp the fundamental principles that govern its appearance. Flames are not static objects; they are dynamic, ever-changing forms of light and heat. Their visual characteristics are influenced by fuel type, oxygen availability, and environmental factors. For artists, this means focusing on fluidity, light, and color transitions.
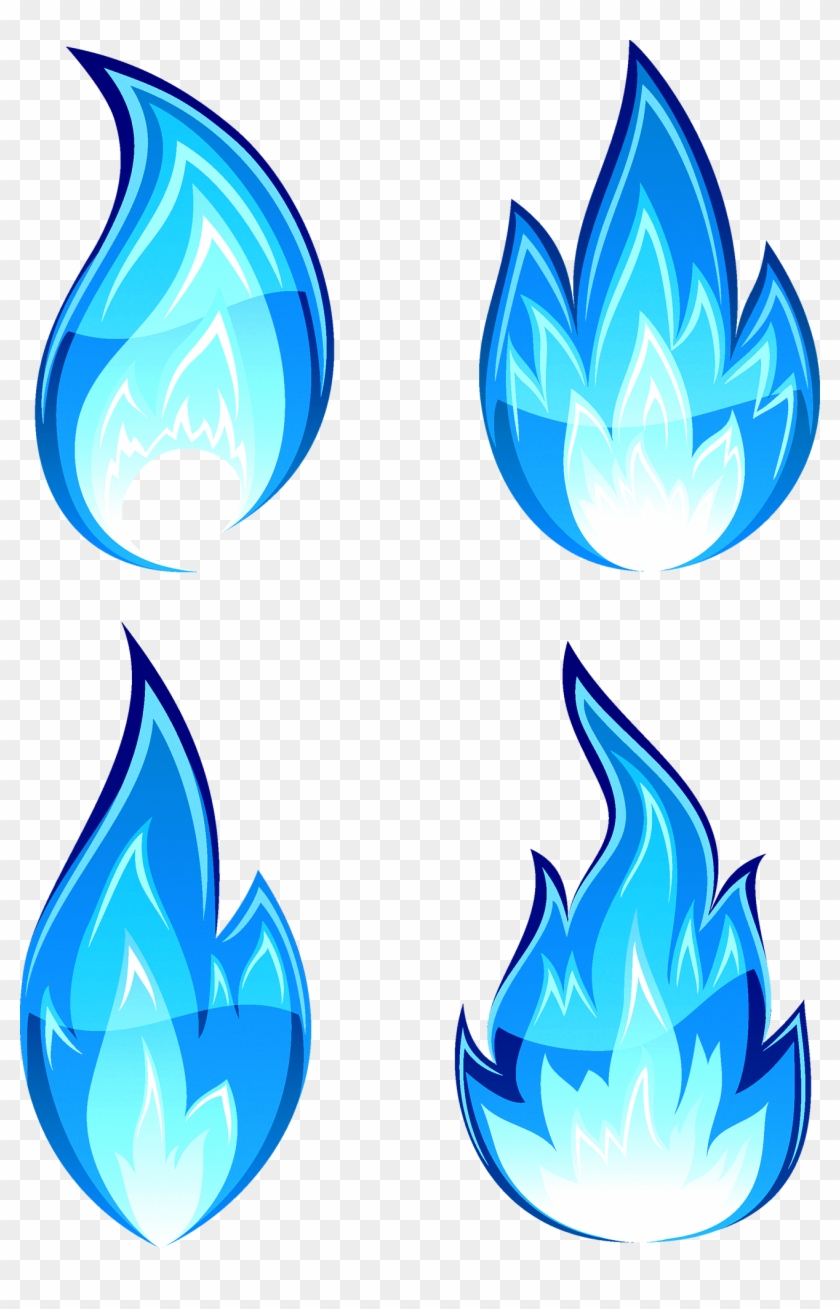
At its most basic, a flame can be simplified into a series of interconnected, curvy shapes. As one drawing tutorial suggests, "For this part, we will be drawing in a curvy lined shape that looks a little bit like a tadpole. It may not look like much now, but this will be forming the center of what will soon be a magnificent flame drawing." This initial simplification is key to capturing the organic flow of fire without getting bogged down by details too early. Think of the flame as a living entity, constantly reaching upwards, flickering, and swaying. Understanding this inherent movement is more important than memorizing a fixed shape.
The core of any flame is its light. Fire is a light source, and this must be reflected in your drawing. The brightest part of the flame is usually its core, gradually fading outwards. The light cast by the flame also illuminates its surroundings, creating dramatic shadows and highlights that can greatly enhance the realism of your artwork. Moreover, the colors within a flame are not uniform. They transition from bright whites and yellows at the hottest core to oranges, reds, and even blues or purples at the cooler edges, depending on the fuel and temperature. Observing real flames—a candle, a campfire, or even a gas stove burner—is invaluable for understanding these subtle transitions.
Essential Tools and Materials for Drawing Fire
The tools you choose for your flame drawing will significantly impact the final outcome. While the basic act of drawing involves making marks on a substrate, the specific medium allows for different textures, color blending, and expressive qualities. Both traditional and digital artists have a wide array of options.
Traditional Drawing Mediums
- Pencils: Graphite pencils are excellent for sketching the initial outlines and understanding the form. Varying hardness (2H for light lines, 2B for darker) helps in building depth. Colored pencils are fantastic for layering and achieving subtle color gradients within the flame.
- Charcoal: Ideal for creating dark, dramatic backgrounds, which, as one tip suggests, "The darker your background, the more dramatic your flames will appear." Charcoal's ability to smudge and blend makes it great for smoky effects around the flame.
- Pastels: Soft pastels and oil pastels are exceptional for capturing the vibrant colors and soft transitions of fire. "For the boldest flame drawings, use pastels on a black piece of paper," offers a great tip for maximizing impact. Their blendability allows for seamless color mixing, mimicking the flickering nature of flames.
- Inks and Markers: For bold, stylized flames, inks and markers can provide crisp lines and intense colors. Layering translucent markers can create interesting depth.
- Paints (Watercolor, Acrylic, Oil): While technically painting, many drawing principles apply. These mediums allow for incredible color depth and blending, crucial for realistic flame depiction. Watercolors offer luminosity, acrylics provide versatility, and oils allow for rich textures and long working times.
- Paper/Substrate: The choice of paper is vital. Smooth paper works well for detailed pencil work, while textured paper can add character to charcoal or pastel drawings. Black paper, as mentioned, is particularly effective for making bright flames pop.
Digital Art Tools
Digital drawing offers unparalleled flexibility and a vast range of brushes and blending modes. Software like Adobe Photoshop, Procreate, Clip Studio Paint, or Krita, combined with a graphics tablet, can simulate almost any traditional medium. Layers allow for non-destructive experimentation with colors and effects, making it easier to refine your flame drawing.
The Anatomy of a Flame: Breaking Down Its Structure
To draw a convincing flame, it helps to understand its basic anatomical zones. While fluid, these zones generally remain consistent:
- The Core (Hottest Part): This is the brightest, most intense part of the flame, usually appearing white or very light yellow. It's where combustion is most complete.
- The Luminous Zone: Surrounding the core, this area is typically bright yellow to orange. It's still very hot and emits a lot of light. This is often the most visually prominent part of the flame.
- The Outer Zone (Cooler Edges): As you move further from the core, the temperature drops, and the colors shift to darker oranges, reds, and sometimes even blue or purple, especially at the base where oxygen mixes. This zone often has a more transparent or wispy appearance.
- The Smoke/Soot Trail: Depending on the fuel and combustion efficiency, a flame might produce a dark, wispy smoke trail above it. This adds realism and indicates the direction of heat and airflow.
- The Base: The point where the flame connects to its fuel source. This area can be particularly interesting, sometimes showing cooler blue tones or a more concentrated, stable form before the flame begins its upward dance. For instance, when drawing a candle flame, you'd "Draw a small rectangle with one side open. This will be the candle that will hold our flame. Draw a small line in the direction you want the [wick to extend]."
Step-by-Step Guide to Basic Flame Drawing
Let's walk through a simplified process to create a basic flame drawing. This builds upon the foundational principles and can be adapted for various flame types.
- Start with the Base and Overall Shape: Begin by establishing the source of the flame. If it's a candle, draw the candle and its wick. For a campfire, sketch the logs. Then, as suggested by drawing tutorials, "Draw the bottom outline of the flames," perhaps a semicircular line for a single flame or a wider, irregular shape for a larger fire.
- Form the Core: Inside your initial outline, draw a smaller, curvy shape that will form the brightest, hottest core of your flame. This could be the "tadpole-like" shape mentioned earlier. This is the heart of your fire.
- Build the Middle Part: "Depict the middle part of the flame" by extending lines upwards and outwards from the core. These lines should be smooth and organic, mimicking the upward flow of heat. Think of gentle, elongated S-curves.
- Add Side Flames and Flickers: "Continue the lines and add the rest of the flames on the sides." Flames rarely rise in a single column. They often have smaller, secondary flickers or tendrils peeling off the main body. These add dynamism and realism.
- Define the Top: "Add the top of the flames. With the help of smooth lines, draw a pointed outline." The top of a flame is usually pointed, but not sharply so. It should have a soft, almost ethereal quality as the heat dissipates.
- Refine and Blend: Once the basic outline is established, begin to fill in with color or shading. Start with the brightest colors at the core and gradually transition to darker tones outwards. Use blending techniques to create seamless color shifts.
- Add Details and Environment: Consider the light cast by the flame on its surroundings. Add subtle highlights and shadows to objects near the fire. If appropriate, include wisps of smoke or embers.
Advanced Techniques for Realistic Flame Drawing
Moving beyond the basics, achieving a truly realistic flame drawing requires attention to subtle details and a deeper understanding of light and movement. As one tutorial notes, "The basic principles are the same that we used to draw basic flames but this rendition requires a little bit more skill and attention to detail."
Mastering Color and Light in Flame Art
Color is paramount in depicting fire. It's not just about yellow and orange; it's about the spectrum within. "For more realism, concentrate on the subtle transitions of color in the flickering flames you want to draw."
- Color Temperature: Remember that white and light yellow are the hottest parts, transitioning to orange, red, and sometimes even deep blue at the cooler edges or base where unburnt gases might be. Experiment with unexpected colors like magenta or purple in the deepest shadows or coolest parts of the flame for added depth.
- Luminosity and Glow: Flames don't just have color; they emit light. This means the areas immediately surrounding the flame should be illuminated by its glow. Use a soft, diffused light effect around the flame itself. This is often called "subsurface scattering" in advanced rendering, where light appears to glow through the material.
- Reflections: If there are reflective surfaces nearby (like metal, water, or even polished wood), show the flame's reflection on them. This adds incredible realism and depth to your scene.
- Contrast: The interplay of bright flames against a darker background creates dramatic visual impact. As Martin Wittfooth's illustration might demonstrate, "The darker your background, the more dramatic your flames appear." This contrast helps the flame stand out as a powerful light source.
Adding Dynamic Movement and Flicker
Flames are never still. Capturing this movement is crucial for realism.
- Irregularity: Avoid perfectly symmetrical shapes. Flames are inherently chaotic. Vary the height, width, and number of individual tendrils.
- Soft Edges: The edges of a flame are rarely sharp. Use soft blending or feathery strokes to give them a wispy, ethereal quality, suggesting the constant dissipation of heat and light.
- Trail and Afterglow: Consider the path the flame has just taken. A slight blur or a faint, lingering glow behind the main body of the flame can suggest rapid movement and flickering.
- Environmental Interaction: Show how the flame reacts to air currents. A gentle breeze might cause it to lean, while a stronger gust could make it dance wildly.
Drawing Different Types of Flames
While the basic principles apply, different sources produce distinct flame characteristics. "These are the candle flame and campfire you will be drawing" are excellent starting points.
- Candle Flame: Typically small, teardrop-shaped, with a bright white/yellow core, orange body, and often a small blue base. The wick is crucial.
- Campfire: Larger, more irregular, with multiple tongues of flame. Colors will be richer reds, oranges, and yellows, with more smoke and embers. The interaction with logs and ash is important.
- Torch Flame: Elongated, often wind-swept, with a strong directional flow.
- Explosion/Burst of Fire: More violent, fragmented, and chaotic. Emphasize outward motion, debris, and intense, short-lived brightness.
- Fantasy Flames: This is where creativity truly ignites. Think of the "Lord of Frenzied Flame from the Elden Ring DLC." Such depictions often exaggerate size, color, and intensity, perhaps incorporating swirling patterns or unusual hues to convey magical or destructive power. These fantastical elements often build upon realistic principles but push them to their dramatic limits.
Inspiration and Application of Flame Drawing in Art
Flames are a powerful motif in art, symbolizing passion, destruction, warmth, purification, and transformation. Integrating flame drawing into your broader artwork can elevate its narrative and emotional impact.
- Character Art: Characters wielding fire magic, or those with fiery auras, can be incredibly dynamic. The Elden Ring's "Lord of Frenzied Flame" is a prime example of how fire can define a character's essence and power.
- Environmental Art: Depicting a cozy fireplace, a raging forest fire, or a mystical ritual with glowing embers can set the mood and tell a story within a scene.
- Abstract Art: The fluid, organic shapes and vibrant colors of flames lend themselves beautifully to abstract interpretations, focusing purely on form and color without literal representation.
- Illustrations and Comics: Fire effects are common in action sequences, adding visual excitement and conveying intensity.
- Symbolism: Use flames to symbolize concepts within your art, from the eternal flame of hope to the destructive blaze of chaos.
Many communities thrive on sharing and discussing art. Just as there are communities for games like Elden Ring or One Piece, where discussions, leaks, and gameplay are shared, the art community welcomes discussion, technique sharing, and all kinds of artwork. Engaging with these communities can provide inspiration and feedback.
Overcoming Challenges and Continuous Improvement in Flame Art
Drawing flames can be challenging due to their ephemeral nature. It's easy to feel, "I know I'm not the best at drawing, but I'm okay at it," especially when tackling complex subjects. However, consistent practice and a methodical approach are key to improvement.
- Practice Observation: Spend time observing real flames. Pay attention to how light behaves, how colors shift, and how the flame moves. Take photos or videos for reference.
- Break It Down: If a complex flame seems daunting, break it down into simpler shapes, as you would with basic flames. "In the previous tutorial we studied the basics of how to realize a convincing drawing of flames, here we’ll see a technique to draw a complicated flame. The basic principles are the same that we used to draw basic flames but this rendition requires a little bit more skill and attention to detail." This iterative approach is vital.
- Experiment with Mediums: Don't stick to just one tool. Try pastels on black paper for bold effects, or watercolors for a softer, more ethereal glow. Each medium teaches you something new about depicting light and form.
- Seek Tutorials and Feedback: Online resources are abundant. "Thanks for visiting our drawing tutorial in 5 minutes, Be an expert in drawing by learning to draw in just 5 minutes, Follow our step by step tutorial and be..." While becoming an "expert" in 5 minutes is ambitious, structured tutorials, like those found on YouTube channels such as Kids Art Hub (which offers animated drawing lessons for children of all ages), can provide valuable step-by-step guidance. Share your work in art communities for constructive criticism.
- Embrace Imperfection: Fire is imperfect and chaotic. Your drawings don't need to be geometrically precise. Embrace the organic nature of the subject.
Conclusion: Igniting Your Artistic Journey
The art of flame drawing is a rewarding endeavor that pushes artists to master fluidity, light, and color. From understanding the basic "tadpole-like" shapes to applying advanced techniques for realistic flickering and glow, the journey of depicting fire is one of continuous learning and artistic growth. We've explored essential tools, broken down the anatomy of a flame, and provided step-by-step guidance to help you capture this dynamic element.
Remember, the key to mastery lies in consistent practice and keen observation. Don't be discouraged by initial attempts; every stroke brings you closer to capturing the elusive beauty of fire. So, grab your preferred drawing tools, find a source of inspiration, and let your artistic spark ignite. We encourage you to share your flame drawings in the comments below, discuss your favorite techniques, or ask any questions you might have. Let's build a community where we can all learn and grow together in the fascinating world of art!